Showing posts with label diy. Show all posts

DIY/ Improvise: Bag Rack Behind Door

Hi everyone! Today I will share something that I did to organize my bags. Well, women are usually associated with owning lots of bag. It is true! I do own many bags which sometimes, some of them I rarely use or I do not know how to match it with outfit or place that I’m heading to. Buying and owning bags are easy but to store them at home, is difficult.

I scroll down Carousell timeline, and I saw this amazing idea of Bag Rack behind door. Which I think could solved my storage problem. Furthermore, it was cheap, it only cost me RM20 including postage. So I did not wait long, straight contact the seller and purchase my Bag Rack.

However, when I received, it was not in a good condition, the postage wrapping was okay (not torn apart), but the box inside were in terrible condition. The box look like a second hand/old/used products that was given to me then. But I keep in mind positive, it is not the box that I wanted, but the content. However, the straps and the claps to hold bags looks so fragile. Then, with lots of excitement, went straight to room, try to assemble it and hang my bags. Unfortunately, it does not fit. According to seller, it can fit to any door. This is so disappointing.

DIY/IMPROVISE
BAG RACK
Behind Doors


This is not fully a DIY project but it is more to improvise the original product. The length of the straps can be adjust, but still it shorts a few inches to fit my door. Since it does not fit and I do not want to waste my money, I have to improvise and make use of my craft skills in order to make it fit to my door. 


Can you see in the red circle, it does not fit to my door! So, I decided to not waste it but some creativity may needed to solve this problem.

These are tools and items that I used to improvise this bag rack, scissors, ribbons (any type you like, I used satin ribbon), lighter and do not forget, Hot Glue Gun (or any glue that strong enough to hold). This is very simple and easy. Anyone can do it.


Step by Step: 

It is pretty easy right. You just need to replace the shorter part of the bag rack and replace it with ribbon with suitable length to fit your door. Cut  the shorter part, measure the length needed to fit, cut the ribbon, replace it with the ribbon, secure it with hot glue gun (to make it stronger) and then voila!

 
This is how it looks like when I put it on my door.


And this is how the end product look, when I put on some of my handbags! Nicely organized. This is a great idea for people who have smaller bedroom, or do not have any place to store their handbags.

These are some of my bags that I often use and some of them are new. Since my drawers for bags are full already, thus I have nowhere to store them. It is a great idea to store them like this. Save up some space, and look neat as well.

Tips: If you are a fans of leather bags, please please do not store them in any secluded or closed storage. It better if you can hang it or let it aired. Or else you bags will be ruined. So it is best if you hang it, and if it comes with dust bag, put it in the dust bag then hang it. Some of my bags are already ruined =’(

Advice: To those online shop operators out there. Please do your business in ikhlas way, because, In Sha Allah, if you really sincere, pleases your customer, Allah will grant you with more rezeki. A satisfied customer will come back to purchase another or they will recommend you to their friends and family. Not all online shop operators conduct their business recklessly, but some did. Just like what I had received. Yes, it is one of the disadvantages of online shopping that people afraid of. These kind of seller cost customers’ trust in buying via online shops affecting other online sellers as well. What would you feel, if you received the items in unsatisfied condition, you won’t like it isn’t it, so why would you do such thing to others?  

If anyone else having the same problem as I am, I hope I able to help you with this post.
Thank you for your time and I hope this has help you. Keep coming back, more reviews and tips are coming up. For any products suggestions or any tips that you would like me to try it out, you may do so, just leave your comment okay? Have a nice day!

*Disclaimer: Any products review in this blog are purchase with my own money and no sponsorship or paid review whatsoever unless it is stated. Merely my own experience and opinion on these items. 

Tips: DIY Coffee Scrub


Have you heard about Coffee Scrub? I heard it’s amazing! Lots of review stated that it does give your skin smoother, brighter and give more glowing effect after using coffee scrub.  Just Google it, everyone is talking about the benefit after using coffee scrubs and they all love it, either in the blog or even in the YouTube page. Well, I would like to try but somehow I find it expensive to buy a readymade ones so then I Google the recipe and I thought this should be easy and fun to make. Then, I went to buy the ingredients and started to make them! The results are amazing!

Here is the Recipe:
It is so easy and these ingredients probably available just around your house. Basically I just estimate the amount of ingredients, depends on how many you would like to produce.

1 cup of Ground Coffee
1 table spoon of Ground Cinnamon Powder
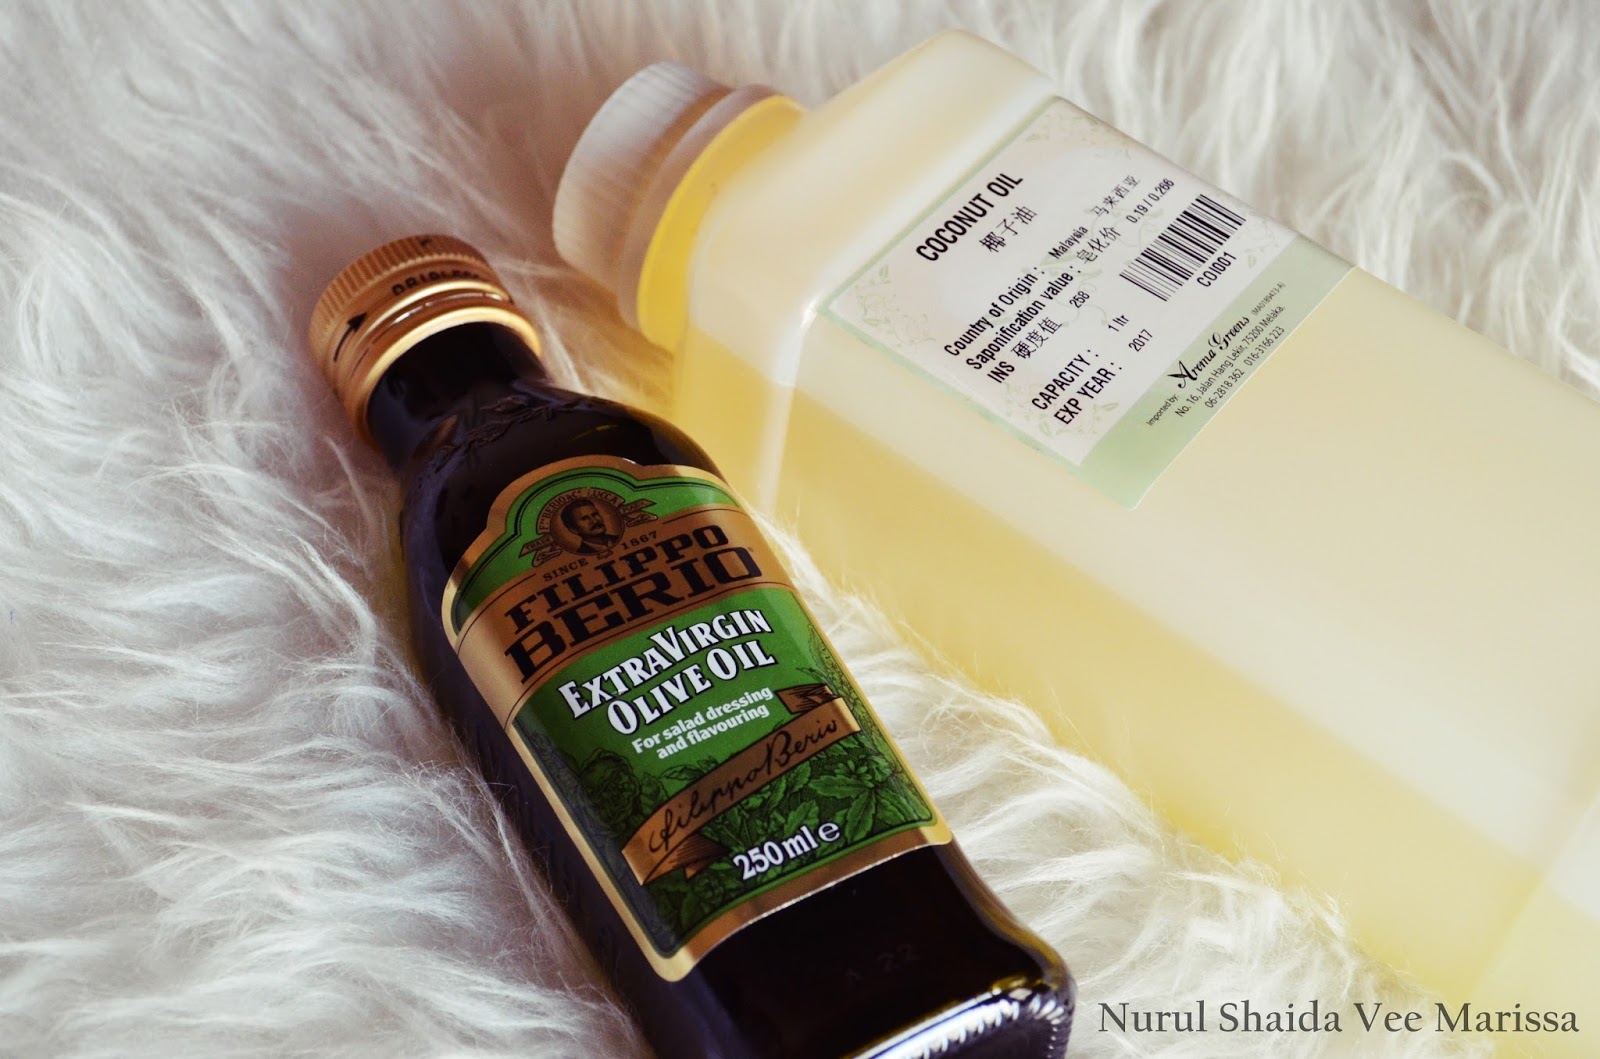
¼ of cup Extra Virgin Olive Oil (optional you can just mix with any oil you want)
¼ of Coconut Oil (optional you can just mix with any oil you want) REMEMBER
*since I’m using 2 types oil so I just divide half of ½ cup of oil portion (1/4 cup each oil)
½ cup of Brown Sugar
*make sure you mix all the dry ingredients first, make sure it mix well, then only you add the wet ingredients, and mix all the good things together. Then voila!!!

Glass Jar which only cost RM5 at Daiso
Olive Oil and Coconut Oil for the Liquid Ingredients

Dry Ingredients
Make sure you mix the dry ingredient well first

Then add the liquid ingredients. 


How to apply?
Scrub your desire body part and make sure scrub in CIRCULAR motion towards your heart.
Leave it or wrap your body part (tight, belly, arm) with clear wrapper for around 15-20 minutes, for toned effect.
Rinse it off! Voila!
You can even use it for your face! Scrubs and rinse it off.
Note: Make sure do this in the bathroom as it will get messy. Another tips, for face, make sure you scrub gently okay?

Reasons why these ingredient?
Ground Coffee
Coffee is known as rich in antioxidants, contain anti-inflammatory ingredient, and caffeine which helps dry out excess moisture on your skin. The caffeine is also beneficial in reducing cellulite where it tighten and firming skin through dehydrate the fluid in the cellulite areas. The results give temporarily tighter and firmer. Not only that, the Ground coffee also helps in stimulate blood flow and circulation. So, all you need to scrub in circular motion with movement towards your heart. The ground coffee also acts as mild exfoliate as it removes dead skin cell and expose the skin to absorb other benefits form the rest of the ingredient in this scrubs.  

Ground Cinnamon Powder
Cinnamon function is not only limited to additional flavour in various of cuisines but it also can help in boosting your beauty. There are several researches being conducted all over the world about the benefits of cinnamon for diabetes, hair loss, cholesterol, memory, arthritis, skin and more. (go Google it, for more info). Cinnamon helps in clearing any bacteria in your skin. It also can improve fine lines by plump the skin as it can stimulate blood vessel and bring blood to the surface of the skin. You can feel it after the scrub, I did feel that. Cinnamon also can be used to treat eczema and acne, reducing aging signs and also functioned as antiseptic in healing wound.

Extra Virgin Olive Oil
Olive oil is popular with loads of benefits. In term of skin, it gives moisturizing, cleansing, and protecting the skin. A perfect moisturizer especially to the dry skin texture and olive oil also able to regenerate skin tissue and regular usage can maintain the skin in smooth and soft at the same time keep it firm. The oil can also be used as natural make up remover! The best thing about olive oil is that, it can penetrate the skin and help different layers of skin as you know, stretch marks locate underneath the outer layers of our skin, thus olive oil able to help reducing stretch marks. The antioxidants present in olive oil- hydroxytyrosol along with the vitamin E help in preventing cell degeneration in your skin, thus preventing premature aging skin.

Coconut Oil
Coconut Oil is one of my favourite oil! It does give miracle to my hair and my eyelash – read my Tips Lebatkan Bulu Mata dengan Natural Ingredients. It’s incredibly moisturizing and filled with vitamins and minerals, which it locks securely into your skin. Coconut oil contain lots of Vitamin E, as many aware that the contributions of vitamin-E towards skin care are well known. It is essential for healthy skin growth, repair the skin, keeping skin smooth and protecting against cracking. It also help preventing aging and wrinkling of the skin, due to it antioxidant properties. Coconut oil also rich in many protein which help in rejuvenate skin internally and externally. Above all, it the benefit of this oil is undeniable!

Brown Sugar
Brown sugar gives you a radiant, clean and healthy skin. Sugar contain glycolic acid, an alpha-hydroxy acid that is vital for maintaining healthy skin and usually found as key ingredient in pricey product. It is not only helps condition and moisturize skin, but protect it from toxins. Not only that, it also cleanse well and avoid clogging skin which will helo in reducing acne or further breakout. Why is it I choose brown sugar instead of just a normal sugar? Because, brown sugar is gentler to the skin, thus it is suitable for the sensitive skin like mine. If you do not have brown sugar, just use your regular sugar.

There are many more benefits each of these ingredients, do Google it for more elaborate explanation and benefits. All ingredients are natural so what are you waiting for, get pamper of yourself!

 Let’s talk about the benefits of this FABULOUS COFFEE SCRUB!
GET RID OF CELLULITE AND STRECTH MARKS
TIGHTENS AND TONED SKIN
SMOOTHENS AND MOISTURIZE
EXFOLIATES DEAD SKIN CELL
IMPROVE SKIN TONE
STIMULATE BLOOD CIRCULATIONS
REDUCE FINE LINES
REMOVE AGING SIGN / PREMATURE AGING
MANY MORE BENEFITS!!

Review:
I’ve made it and I’ve used it! Yeayy. Oh my, first of all, it smell damn good! I really feel like I’m going to eat it, nyum nyum, it smell so good. Oh no no, save it for your skin Vee. In my own opinion, the scrub quite coarse for my skin, I think. So, I am suggesting that when you scrubbing, please do it gently or else you are going hurt yourself. Another thing, this coffee scrub does get messy, so, I would advise you to do it while you are showering. It will go everywhere, trust me! After rinse the scrub off my face and arms, I do feel my skin plumping. I guess it blood is circulating, and I can feel the blood is going up to my skin surface. In terms of moisturizing, yeah, it does moisturize, not too much but I would say, it just enough moisture to my skin, which is good though. The best part, my favourite, my skin feels really smooth! I love it! I love it so much. I’ve tried a few scrub before, but most of them are drying out my skin and it really feels uncomfortable. I am definitely going to keep this as one of my beauty routine starting today!


Cost of making this scrub?
Ground Coffee RM 17.20
Ground Cinnamon Powder RM 1.90
Extra Virgin Olive Oil RM 13.90
Coconut Oil Couldn’t remember but I think somewhere around RM12
Brown Sugar RM 2.15
Jar RM 5 each

For only around RM50 as total cost of buying the all the ingredients, now I can make even more coffee scrubs rather than buying the one’s readymade (around 1 jar only, now I can make more jars! Yayyyy!), definitely cheaper and save cost! For the voluminous benefits with low cost, this DIY Coffee scrub does win!


Additionally, you can add a bow and some notes as present to your friends or family. Surely they will like this damn good beauty item! You can give to your girlfriends on your slumber party or even on your bachelorette party or any occasion! Plus it is fun to make!


If you made this recipe, please let me know, you can leave your link or you can tag me in Instagram @veemarissa

Good luck ladies! 

Tips: Lebatkan Bulu Mata dengan Natural Ingredient


Hi dan Assalamualaikum.

                Harini Vee nak share my own tips/testimoni. Before, kita proceed, Vee nak cerita dulu masalah yang Vee hadapi dengan bulu mata. I have always envy with people who own beautiful eyelashes, selalunya yang Vee tengok eyelashes lelaki ni panjang-pajang, lentik dan tebal. Haish, “aku yang perempuan tak dapat macam tu”.  Hehe, tapi itu bukan main reason lah for my concern kan? Kita go by situation lah eh?

Situasi 1:
                Bila keluar, meeting ke ada urusan ke ataupun ke kelas ke, kita orang perempuan kan, kalau tak letak bedak sikit kat muka tak sah, dok pakai lah sikit lip tint ke tak pun dok pakai mascara tu kan? Asal pakai mascara je, bila nak remove bukan main lagi hebat make up remover tersebut, dengan bulu-bulu mata aku sekali dia cabut nya. Haish.

Situasi 2:
                I hate guna eyelash curler aka pengepit bulu mata. Yelah kita ni jenis rambut lurus, bulu mata pun degil la nak lentik kan, so kena lah guna jugak natang eyelas curler tu nak kasi lentik sikit (walapupun bulu mata ciput je), tapi al-kisahnya, kebanyakan eye lash curler yang Vee beli semua ala-ala gunting. Dok lah excited nk curl kan eyelash sekali dia gunting bulu mata kita. Sobs sobs sobs.

Situasi 3:
                Orang kata kalau bulu mata selalu jatuh ada orang rindu….. ahaks gitewwwwww. Sudah-sudah perasan sudah. Ini kes, tak ada buat apa tapi tahu-tahu je bulu mata asyik gugur. Botak mata aku macam ni. Mungkin akar bulu mata Vee tak kuat kot.

                Macam tu lah kisahnya bulu mata Vee, nak pergi buat treatment kat clinic medi-spa tu mahal pula costnya, adehh kita ni dah la student, harap kan pulak duit tajaan MARA, mana lah mampu nak pergi buat tu semua. So, what I did, Vee mula do some readings kat blogs, ikut tips-tips yang mereka bagi. Tapi…..TIDAK BERJAYA. Macam-macam lah Vee beli, Vaseline lah apa lah tapi mungkin tidak sesuai dengan Vee kot. Satu hari, Vee search kat Youtube, and this one vlogger claimed that her eyelashes grow in just 7 days!! And I was “For real lahh minah ni???”’ But, Vee fikir-fikir, why not give it a try, what I have to loose kan?

                But first, Vee google dulu bahan-bahan yang dia guna tu, so far memang seribu satu kebaikan lah sebab bahan-bahan yang dia gunakan adalah NATURAL INGREDIENTS! So, tak lah takut nak guna kan? Korang boleh google lah, banyak lagi benefit each ingredient tu. Kalau search kat youtube, memang banyak video claimed macam-macam benefit dapat dari ingredient yang sama. So, I bought online, bahan-bahan nya dan mix kan sendiri.

Cara nak buat serum ni senang je!

DIY Eyelash Growth Serum:

Sweet Almond Oil 100% Pure
Castor Oil 100% Pure
Virgin Coconut Oil (if ada lagi better, but Vee xjumpa orang jual)

Now, cari botol atau container, mix kan semua ingredient ni ikut ratio 1:1:1 okay? Senang je kan? 

Cara nak pakai pun senang je, setiap malam sebelum nak tidur tu, sapu lah serum tu kat root eyelashes anda, dan juga pada eyelashes anda. Lepas tu tidur dengan nyenyak nya. Continue lah buat routine yang sama setiap hari.

Hasil:

  Seriously, I’m not promoting this items or dapat sponsors ke apa ye. Ini genuine testimoni. I don't think 7 hari dah panjang menjela bulu mata ku but, some people tegur and notice that my eyelashes actually longer walapun baru seminggu pakai. My eyelashes dah tak gugur dengan teruk (gugur tu ada lah tapi just a normal one), tumbuh lebih lebat dan panjang. Actually, hasil dari pakai serum ni, lebih daripada yang Vee harapkan. So I am totally SATISFIED!!! Vee memang recommended lah kat sesiapa yang ada masalah yang sama, and hopefully, this could help you!! Goodluck!


Take Care